
If you plan on using an LCD with your Raspberry Pi, there’s a good chance you’ll need to program it in Python at some point. Python is probably the most popular programming language for coding on the Raspberry Pi, and many of the projects and examples you’ll find are written in Python.
In this tutorial, I’ll show you how to connect your LCD and program it in Python, using the RPLCD library. I’ll start with showing you how to connect it in either 8 bit mode or 4 bit mode. Then I’ll explain how to install the library, and provide examples for printing and positioning text, clearing the screen, and controlling the cursor. I’ll also give you examples for scrolling text, creating custom characters, printing data from a sensor, and displaying the date, time, and IP address of your Pi.
I’m using a 16X2 LCD display here, but the examples will work with any LCD that uses the Hitachi HD44780 driver.
You can also connect the LCD via I2C, which uses only two wires, but it requires some extra hardware. Check out our article, How to Setup an I2C LCD on the Raspberry Pi to see how.
CONNECTING THE LCD
There are two ways to connect the LCD to your Raspberry Pi – in 4 bit mode or 8 bit mode. 4 bit mode uses 6 GPIO pins, while 8 bit mode uses 10. Since it uses up less pins, 4 bit mode is the most common method, but I’ll explain how to set up and program the LCD both ways.
Each character and command is sent to the LCD as a byte (8 bits) of data. In 8 bit mode, the byte is sent all at once through 8 data wires, one bit per wire. In 4 bit mode, the byte is split into two sets of 4 bits – the upper bits and lower bits, which are sent one after the other over 4 data wires.
Theoretically, 8 bit mode transfers data about twice as fast as 4 bit mode, since the entire byte is sent all at once. However, the LCD driver takes a relatively long time to process the data, so no matter which mode is being used, we don’t really notice a difference in data transfer speed between 8 bit and 4 bit modes.
WIRING THE LCD IN 8 BIT MODE
To connect your LCD in 8 bit mode set it up like this:

The backlight and contrast potentiometers are 10K Ohms, but they can be substituted with 1K to 3K Ohm resistors if you want.
WIRING THE LCD IN 4 BIT MODE
To connect the LCD to your Raspberry Pi in 4 bit mode, set it up like this:
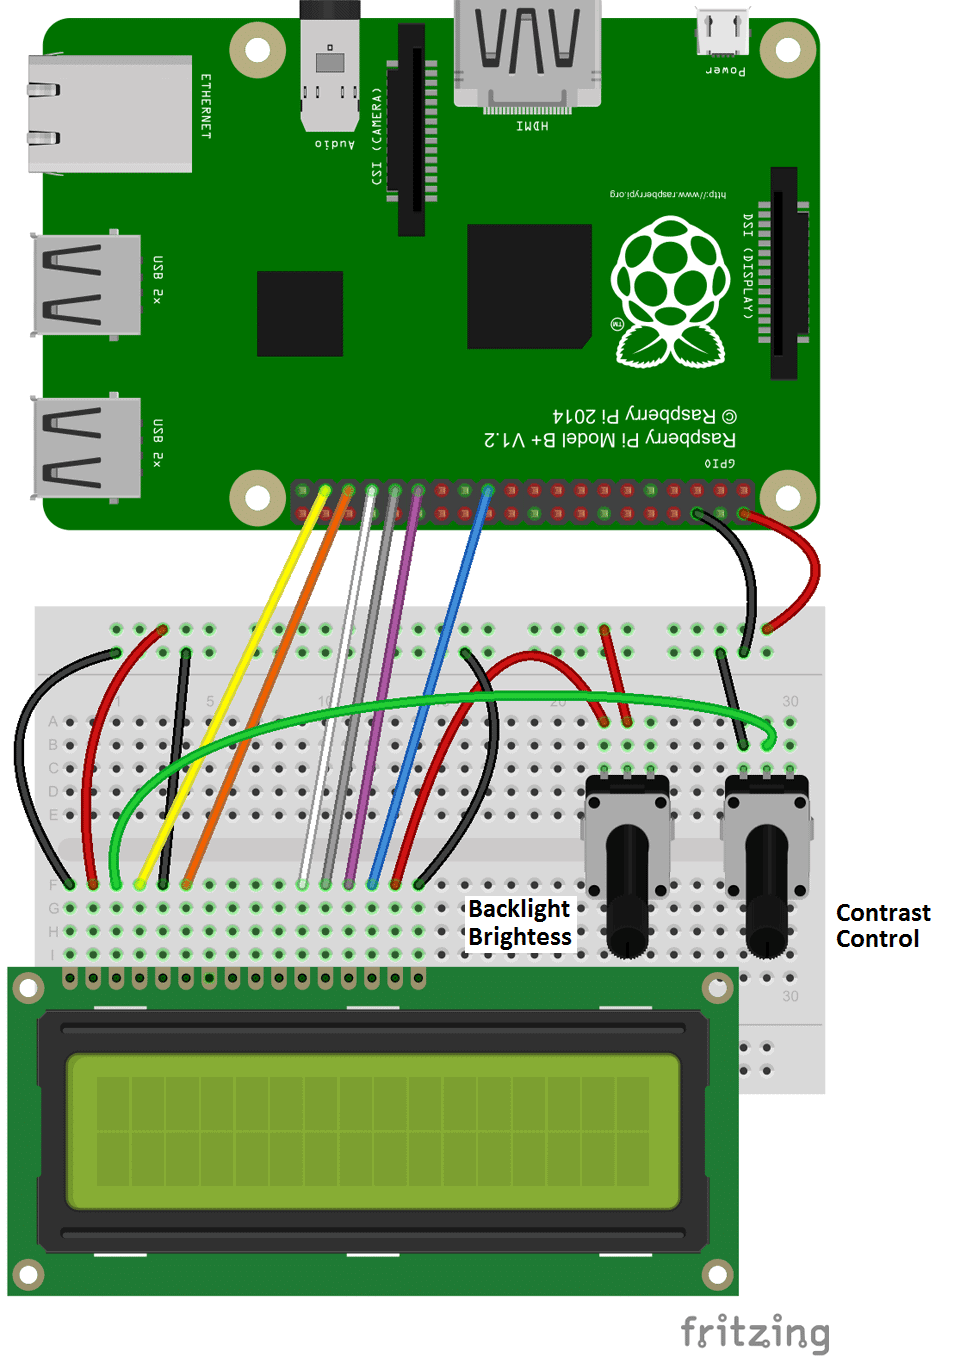
The potentiometers here can also be substituted with 1K or 3K Ohm resistors.
PROGRAMMING THE LCD WITH PYTHON
If this is your first time writing and running a Python program, you might want to read How to Write and Run a Python Program on the Raspberry Pi, which will explain everything you need to know to run the examples below.
We’ll be using a Python library that provides a lot of useful functions. Its called the RLPCD library, and was written by Danilo Bargen.