WHAT IS A BOUNCING SWITCH?
In order for a microcontroller to detect when a switch is open or closed, it has to constantly listen to or poll the switch to detect when the signal changes. But when the button is pressed, the metal contacts inside the button don’t make an instant electrical connection.
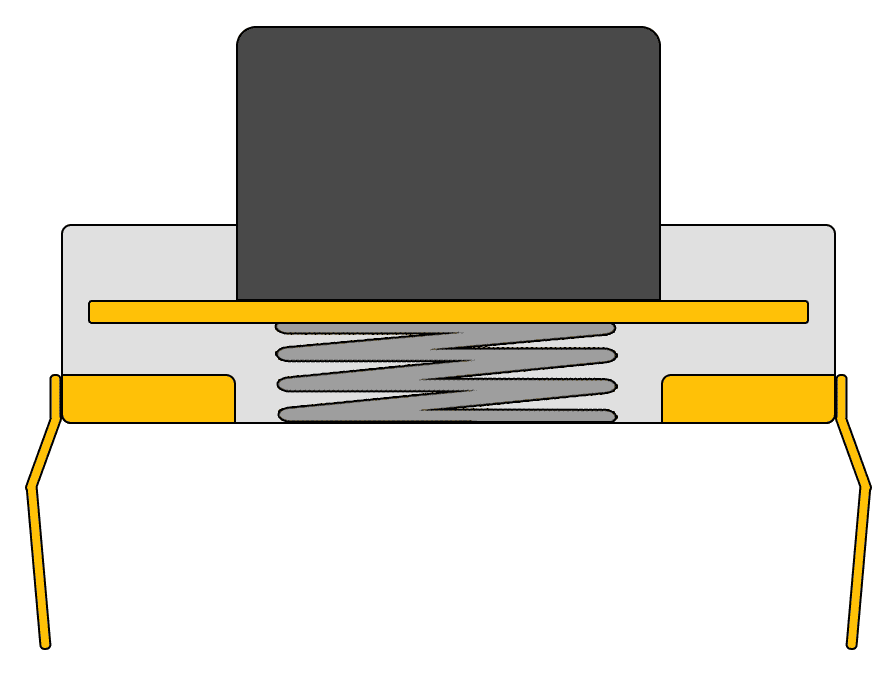
The button might hit one side of the contacts first, then the other side several times before making a reliable connection. Bumps or dirt on the metal contacts can also prevent a good contact right away. This causes the button signal to bounce up and down before settling on a resting state. The bounces usually only last for a few milliseconds, but the Arduino runs so fast that each bounce can be counted as a button press.
If we connected the push button’s output to an oscilloscope, this is what a clean non-bouncing signal would look like:
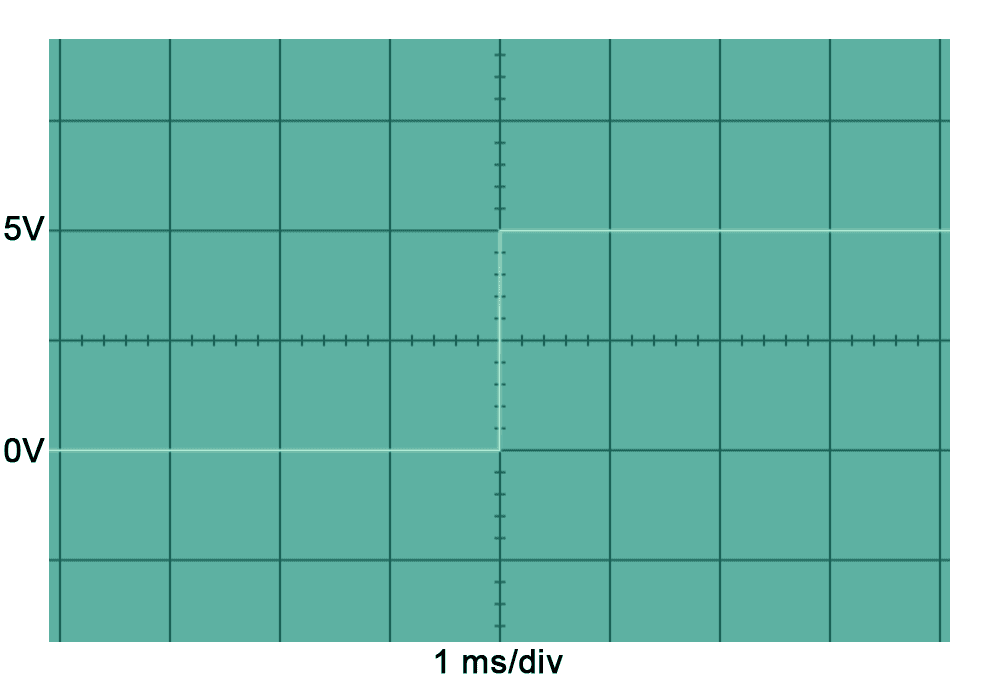
The signal starts low at 0 volts then goes high to 5 volts and stays there.
This is what a bouncing signal would look like:
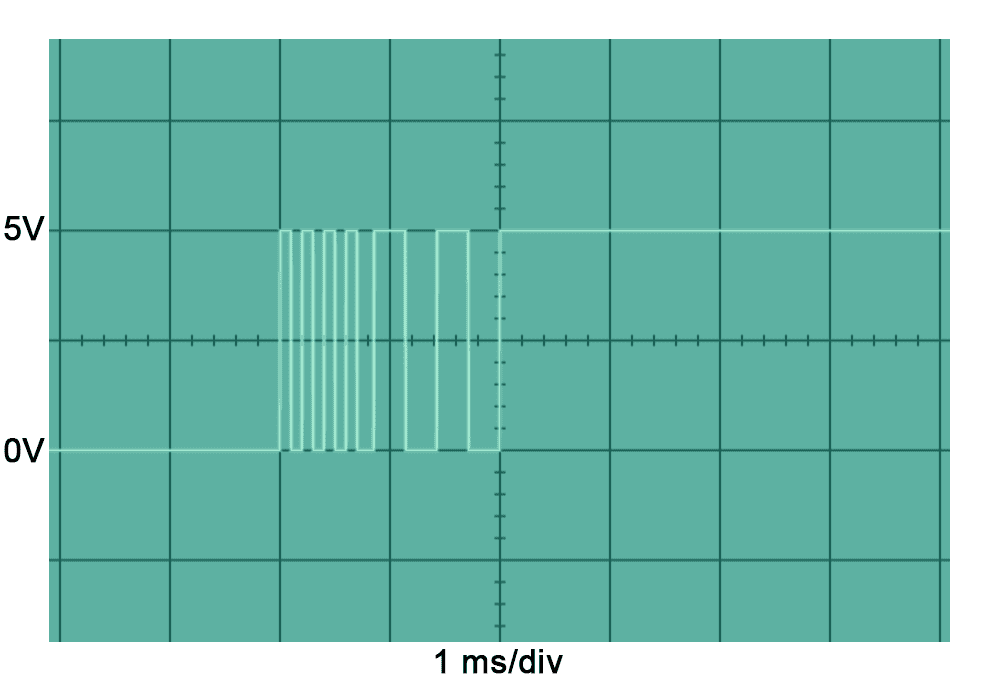
The signal starts low but bounces up and down between 0 and 5 volts before settling on 5 volts. The time scale is one millisecond per division, so this is happening very fast. Even though the bouncing only lasts for two milliseconds, each bounce could be interpreted by the Arduino as a button press.
HOW TO DEBOUNCE SWITCHES WITH HARDWARE
The easiest hardware solution for debouncing switches is to use a Schmitt trigger. Schmitt triggers are usually used to convert analog signals into digital signals, but they can also be used to debounce switches. A Schmitt trigger takes an analog input signal and outputs a digital signal:
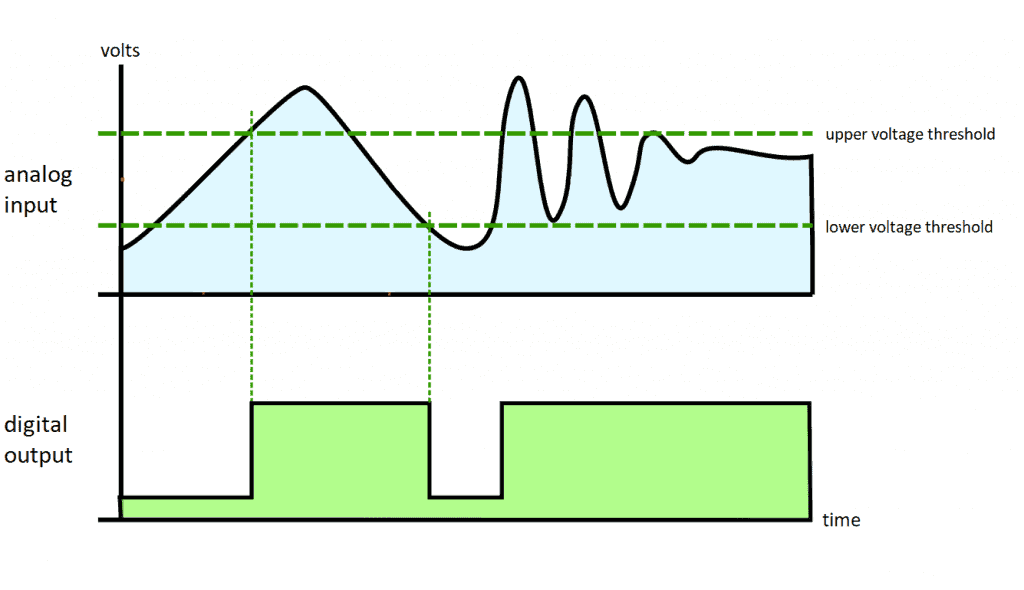
When the input to the Schmitt trigger exceeds the upper voltage threshold, the digital output switches to high. The output switches low when the input signal falls below the lower voltage threshold.
The Schmitt trigger we will use is the SN74HC14N from Texas Instruments:
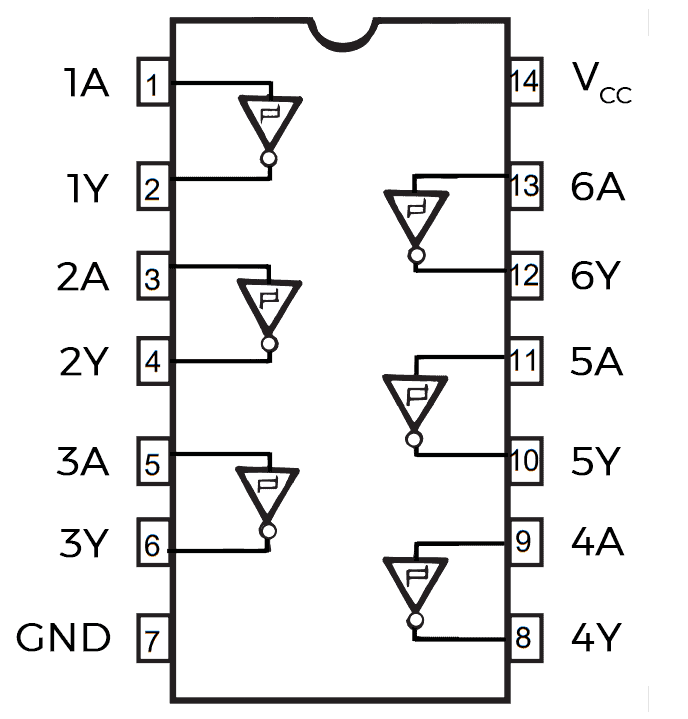
The SN74HC14N actually has six separate Schmitt triggers. The Schmitt trigger inputs are pins 1A, 2A, 3A, 4A, 5A, and 6A. The Schmitt trigger outputs are pins 1Y, 2Y, 3Y, 4Y, 5Y, and 6Y. Power is connected to the Vcc pin, and ground connects to the GND pin.
HOW TO CONNECT A SCHMITT TRIGGER TO THE ARDUINO
Let’s see how to use a Schmitt trigger to debounce switches with an example project that increases the count of a counter each time a button is pressed.
These are the parts you will need to build this project:
Arduino Uno- Jumper wires
- Breadboard
- SN74HC14N Schmitt trigger
- Tactile push button
- 10K Ohm resistor
- 1 uF capacitor
To build the button counter project, connect an SN74HC14N Schmitt trigger and a push button to the Arduino like this:
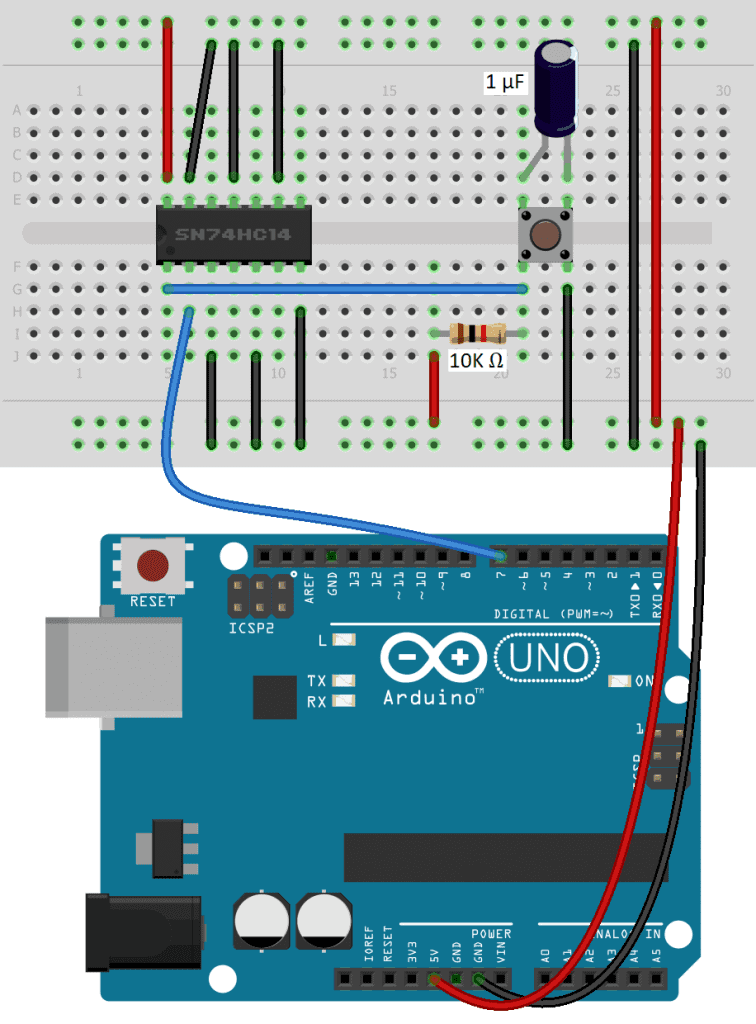
HOW TO PROGRAM A SCHMITT TRIGGER ON THE ARDUINO
The sketch below reads the signal from the Schmitt trigger and increases a counter by one digit with every press of the button. The count is printed to the serial monitor.
Once the Schmitt trigger is connected, upload this code to the Arduino:
int inputPin = 7;
int counter = 0;
int buttonState = 0;
int lastButtonState = 0;

void setup() {
  pinMode(inputPin, INPUT);
  Serial.begin(9600);
}

void loop() {
  buttonState = digitalRead(inputPin);

  if (buttonState != lastButtonState) {
    if (buttonState == LOW) {
      counter++;
      Serial.println(counter);
    }
  }
  lastButtonState = buttonState;
}
Once the code is uploaded, open the serial monitor and you should see the numbers count up one at a time with each press of the button.
To see how switch bouncing affects the counter, bypass the Schmitt trigger by connecting the output of the push button directly to Arduino pin 7. You’ll see that pressing the button once increases the count by multiple digits at a time.
