
ESP8266-01 IoT Smart Relay for Home Automation
Hardware Required
| S.No | Component | Value | Qty |
|---|---|---|---|
| 1) | ESP8266 ESP01 | – | 1 |
| 2) | Voltage Regulator | AMS1117 3.3V | 1 |
| 3) | SMD Resistors | 10K, 1K | 1,1 |
| 4) | Push Button SMD | – | 1 |
| 5) | Relay | 5V | 1 |
Smart Relay Circuit

Steps to Install ESP8266 NodeMcu In Arduino IDE
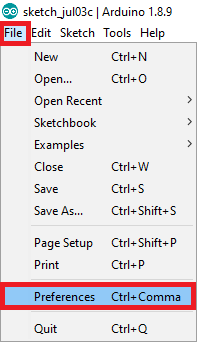
- Navigate to File> Preferences in your Arduino IDE.
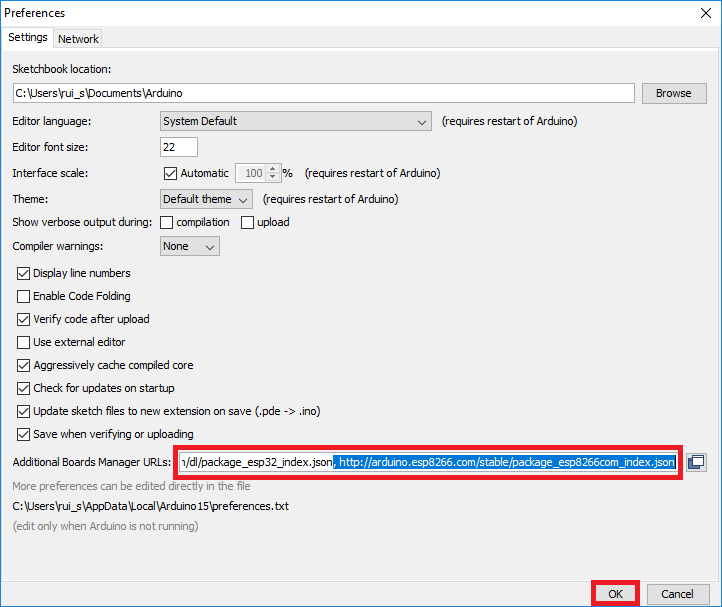
- As indicated in the picture below, enter http://arduino.esp8266.com/stable/package esp8266com index.json into the “Additional Boards Manager URLs” section. Then press the “OK” button. If you already have the URL for the ESP32 board, separate the Links with a comma.
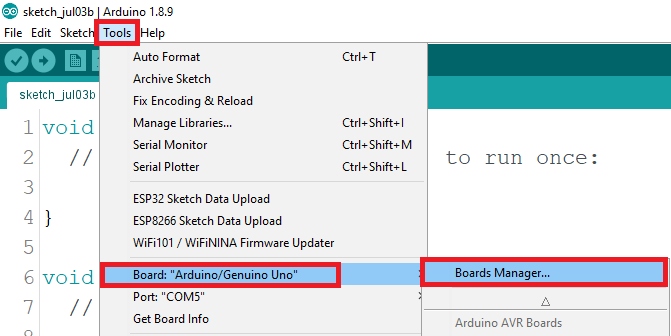
- Navigate to Tools > Boards Manager.
- Search for ESP8266 and click the “ESP8266 by ESP8266 Community” install button.
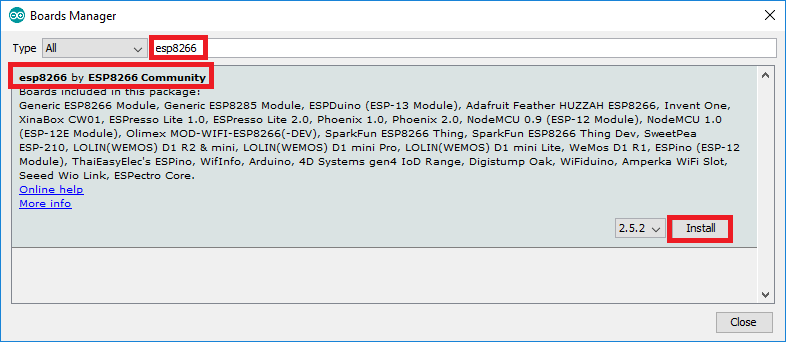
- That’s all. Within a few seconds, it will be installed.
Uploading the Code
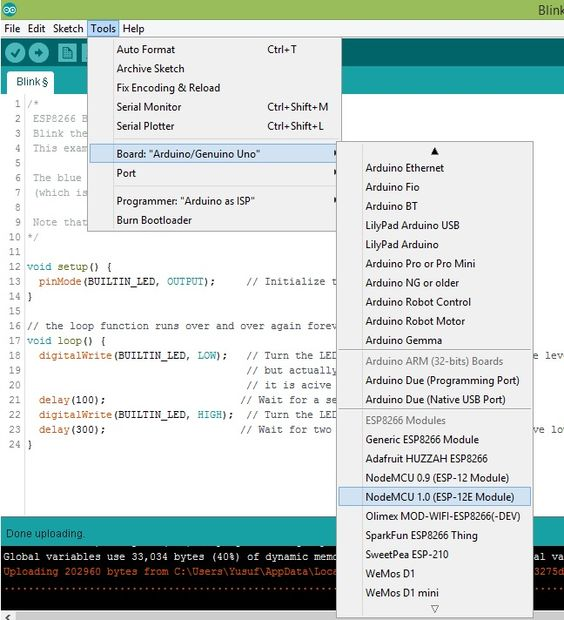
- Because it includes a built-in programmer, posting the sketch is quite straightforward. Connect the board to your computer. Check that you have the correct board chosen.
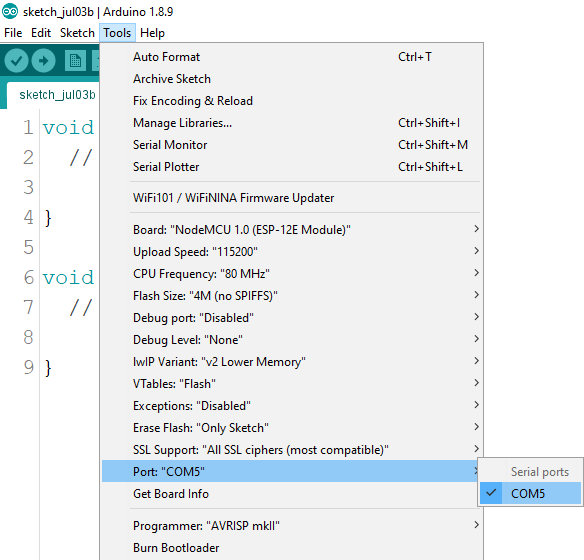
- You must also pick the correct Port.
- In the Arduino IDE, click the “Upload” button and wait a few seconds until you get the message “Done uploading.” in the lower left corner.
Working Explanation
Here’s the circuit’s fundamental operating concept: Using a relay module and the application, we can turn on or off a bulb. After you make the connections properly, upload the code, and then open the Serial monitor. Next, simply copy and paste the provided IP into your phone’s or system’s browser. The application is now available for you to use.
Code Explanation
- First, we have included the libraries for the ESP8266 module. Then define our SSID and password. A char* is a char pointer. WiFiServer(80); This method establishes a server that waits for incoming connections on the given port. The default HTTP port is 80, and the web server is on port 80 here.
- In void setup, WiFi.begin establishes the network settings for the WiFi library and gives the status right away. WiFi.status() Return the connection status. WL_CONNECTED assigned when connected to a WiFi network.
- we give the condition to quit early if any reading failed. WiFiClient client. creates a client that has the connection to a client-defined internet IP address.
Application and Uses
- Lighting control
- Lawn irrigation
- Kitchen appliances
- And, security systems